How to Publish App to Apple Store Xcode – Step by Step
Finally, D-Day has arrived, your efforts gave results to you and you get your iOS application developed. After weeks of changes, new features, bugs, and a lot, now you have your iOS application, and you just need to submit it to the App Store.
But as you are reading this article, you must don’t know about the complete app submission procedure of the App Store. App submission is mostly an afterthought on which you don’t focus at the beginning of the project. But you aren’t should, yet it is not easy as pushing a launch button, neither it is too much complicated.
There are many rewards of successfully submitting the app on the App Store, but there are many obstacles that you need to overcome. According to Apple, 62% of app rejections are due to non-compliance with the main Apple guidelines. In this article, we are going to tell you step by step process for how to publish an app to apple store Xcode?
Step-By-Step Guide to Submit Your App to the App Store
There are more than 2.2 million apps on the Apple App Store. It is seen as the largest treasure to reach millions of users across the world. However, before submitting the app to the App Store you should have a sound knowledge of Apple’s guidelines and requirements for submitting the app smoothly. Even a small hitch can lead to rejection.
Step 1: Generate a Distribution Provisioning Profile and Distribution Certificate for Code Signing on iOS
To ensure secure distribution of your iOS app, you need to create a distribution provisioning profile and distribution certificate for Code Signing. Start by logging into your Apple Developer Account and accessing the Certificates, Identifiers & Profiles section. From there, you can create a new profile and certificate.
Make sure to follow all necessary steps and guidelines, and double-check your information before finalizing the process. This will give you the necessary tools to sign your code and securely distribute your app to users.
Below points (A, B & C) will explain to you to generate a CSR file, a unique distribution certificate & brief process for making “ a.p 12 signing file”.
A. To create a Certificate Signing Request (CSR) file in Keychain on a Mac, Follow these Steps:
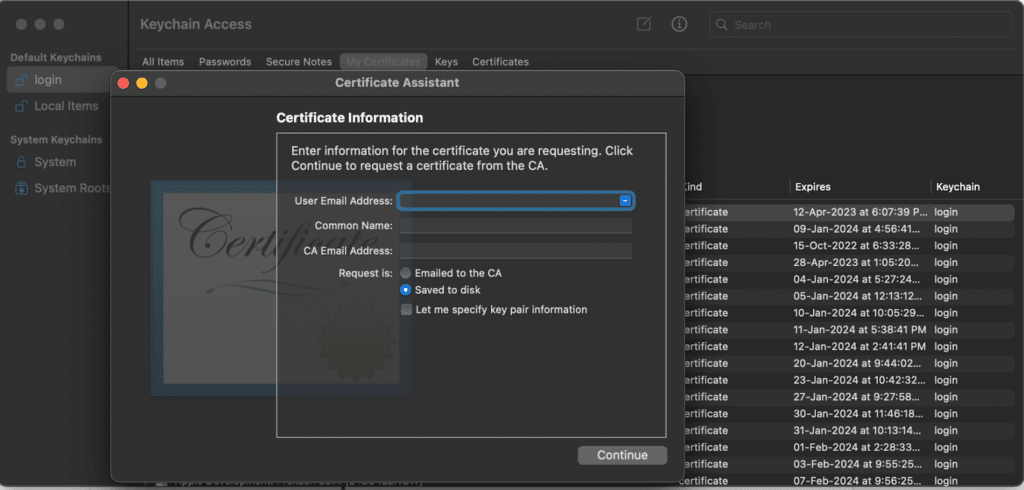
- Open Keychain Access.
- Choose Keychain Access > Certificate Assistant > Request a Certificate from a Certificate Authority.
- Enter your email address and common name (e.g. your name or the name of your organization).
- Select “Saved to disk” and click Continue.
- Save the file to your desired location.
B. Generate a Unique Distribution Certificate
- Log in to your Apple Developer Account.
- Go to the “Certificates, Identifiers & Profiles” section.
- Select “Certificates” and then “+” to create a new certificate.
- Choose “App Store and Ad Hoc” as the type of certificate.
- Follow the steps to generate your certificate, including creating a CSR file and uploading it.
C. Make a.p12 Signing File
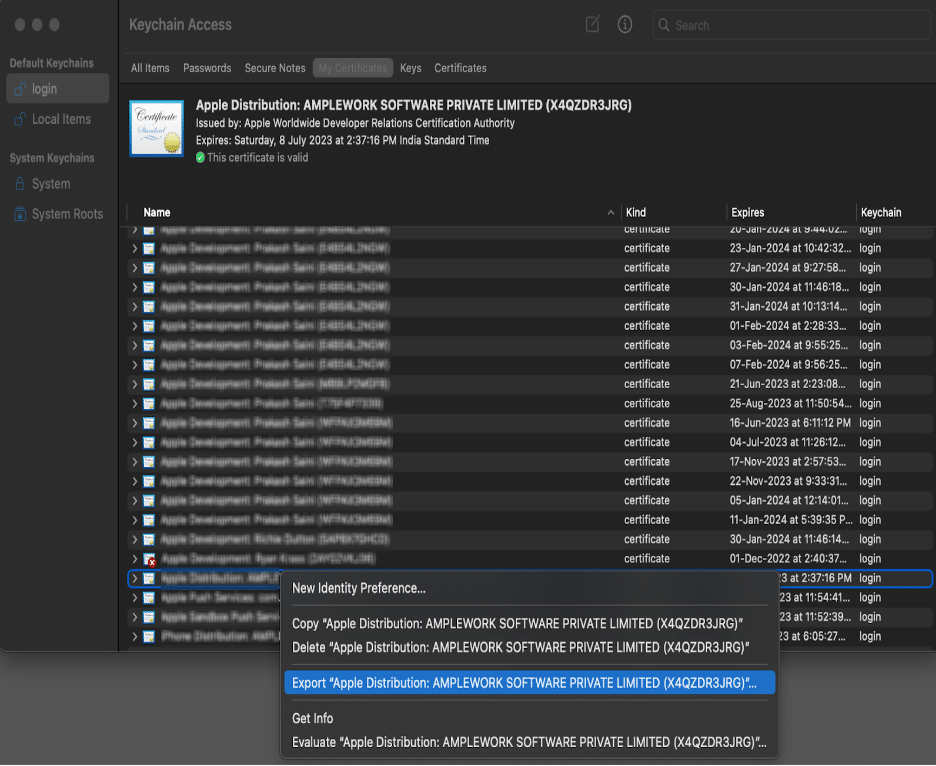
- Open Keychain Access on your Mac.
- Find the distribution certificate you created in the Keychain.
- Right-click the certificate and select “Export”.
- Save the file as a .p12 file, and make sure to securely store the password you use to protect it.
Note: Once, you completed step 1 then you need to follow the below steps to upload app to app store – iOS. All the steps are crucial for knowing the process of how to upload app in app store.
Step 2: Generate a Record for Your App in App Store Connect
To generate a record for your app in App Store Connect, follow these steps in detail:
- Log in to your Apple Developer Account and access App Store Connect.
- On the App Store Connect dashboard, select “My Apps” from the navigation menu.
- In the top-left corner of the screen, click the “+” button.
- From the options that appear, select “New App”.
- On the next screen, you’ll need to fill out the following information:
- App Information: The app’s name, platform, primary language, and bundle ID.
- Availability Information: The territories where the app will be available for download.
- Pricing Information: The app’s price tier and availability dates.
- Contact Information: Your name and contact information.
- App Review Information: Information required for review, including screenshots and a description of the app’s functionality.
- Review all the information you have entered and make sure it’s accurate.
- Agree to the terms and conditions.
- Click the “Submit” button to submit your app information and create the record in App Store Connect.
This will create a centralized location where you can manage all aspects of your app’s presence on the App Store, including its metadata, pricing, and availability. If you are still facing any issues then you can utilize remote iOS services.
Also Read: Numerous validating Testing: get a brief work about the proceedings
Step 3: Archive and Upload Your App Using Apple Store Xcode
To archive and upload an app using apple store Xcode, follow these steps:
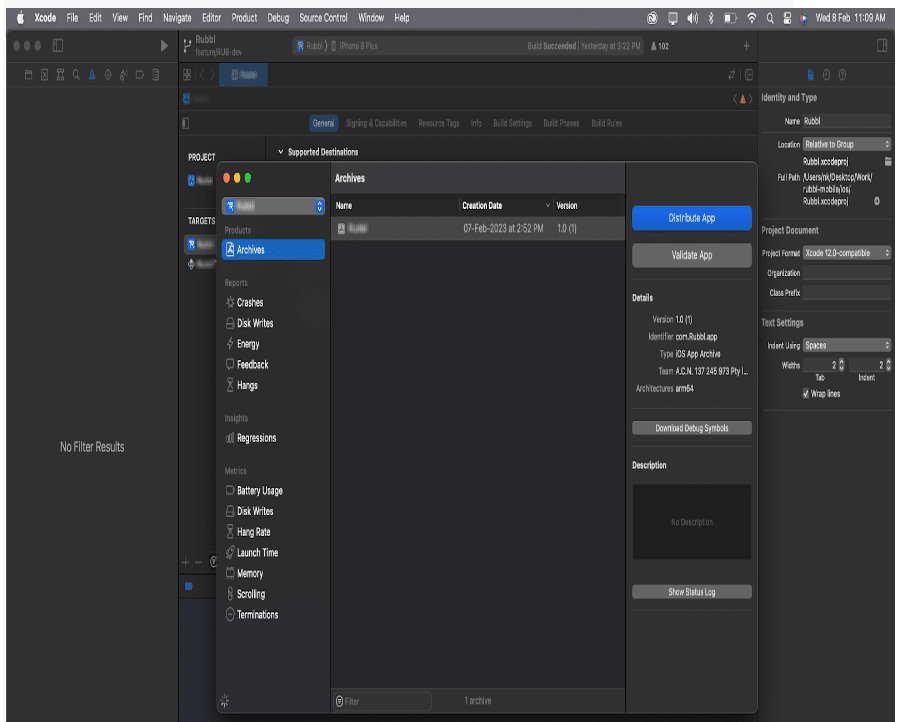
- Open your apple store Xcode project.
- Select the “Generic iOS Device” or a simulator from the top left of the apple store Xcode window.
- Go to the Product menu and select “Archive.”
- Wait for Xcode to compile and archive your app. This may take several minutes.
- Once the archiving process is complete, Xcode will open the Organizer window.
- In the Organizer window, select “Upload to App Store.”
- Sign in with your Apple ID and follow the on-screen instructions to upload your app to the App Store.
Note: Before uploading to the App Store, make sure your app follows the App Store Review Guidelines and that it has been properly tested and optimized. Apart from this, you can test the proper functionality of your products or applications with MVP development services.
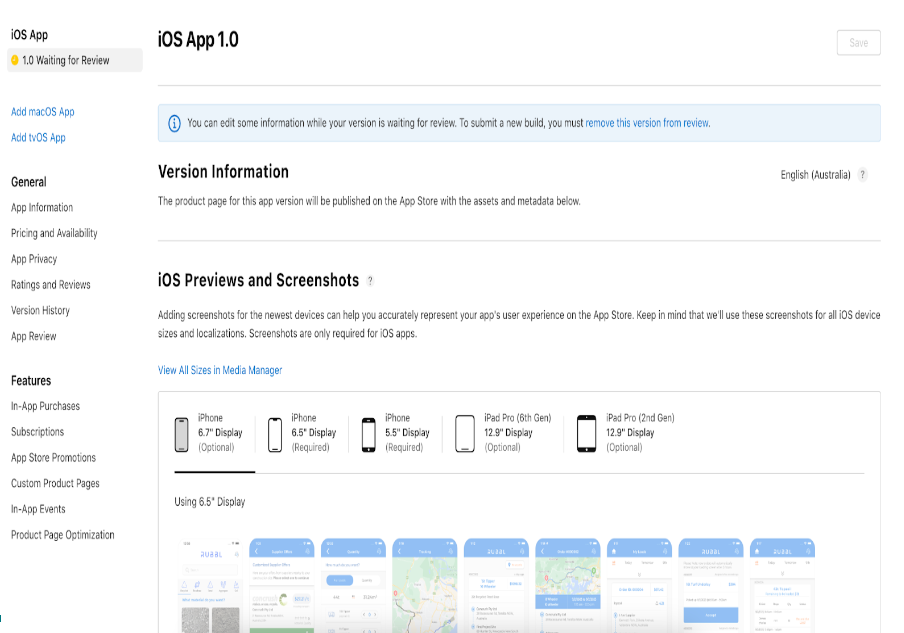
Step 4: Set Up the App’s Information and Additional Details in Its App Store Connect Record
To set up the app’s information and additional details in its App Store Connect record, you will need to follow these steps:
- Log in to App Store Connect with your Apple ID.
- Click on “My Apps” and select the app you want to set up.
- Fill in the app’s basic information such as name, description, and primary language.
- Upload screenshots, app previews, and other media to showcase your app to potential users.
- Select the app’s availability date and pricing.
- Set up in-app purchases, if applicable.
- Provide additional information such as privacy policy URL and support URL.
- Select the app’s categories and assign keywords to help users find your app.
- Set up localization information for your app to be available in multiple languages.
- Once you have completed all the necessary information, submit your app for review.
Step 5: Send Your App for Review to the App Store
To send your app for review to the App Store, follow these steps:
- Log in to App Store Connect with your Apple ID.
- Click on “My Apps” and select the app you want to send for review.
- In the app’s “App Store” section, make sure that all the information and media are complete and accurate.
- Click on “Submit for Review.”
- Answer the export compliance and content rights questions.
- Upload a build that you have previously archived in apple store Xcode.
- Review the app and its information, then submit it for review.
Note: Before submitting your app for review, make sure it meets the App Store Review Guidelines and has been thoroughly tested and optimized. The review process can take several days, and Apple will notify you via email once the review is complete.
Step 6: Monitor the Status of Your App
To monitor the status of your app on the App Store, follow these steps:
- Log in to App Store Connect with your Apple ID.
- Click on “My Apps” and select the app you want to monitor.
- In the app’s “Activity” section, you can see the latest events related to your app, such as the status of your build, the status of your app review, and more.
- In the app’s “App Store” section, you can see the status of your app, including whether it is pending review, under review, approved, or rejected.
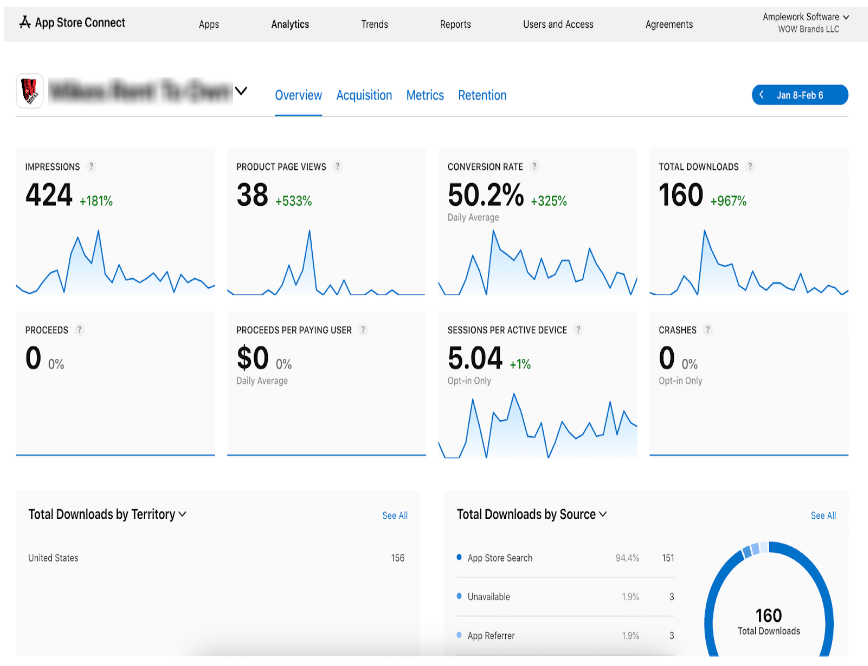
- You can also monitor your app’s performance and downloads, user reviews, and ratings in the “App Analytics” section.
Note: It’s important to monitor your app’s status regularly and respond promptly to any issues or concerns raised by users or the App Store review team. These steps will help you to submit app to app store.
All the above steps incorporate detailed and brief guidelines so that you can know about – how to put an app on the app store? However, if you are still struggling in this process then you can take support from the iOS developers.
Also Read: How to Develop a Pet Care Mobile App Similar to Rover & WAG
App Approval From iOS Store
To submit an app to the iOS App Store, developers need to follow Apple’s guidelines and technical requirements. Apps must pass a review process, which assesses quality, user experience, and compliance with Apple’s policies. Approval can take several days to a week or longer. Rejected apps can be resubmitted after addressing the issues.
The Final Words
Until this point, you gained a detailed understanding of the steps to upload an app to the iOS store. If you are still struggling with the process then we incorporate expertise in iOS app development which will help you to easily submit apps to the App Store. Let us know your app requirements and we would adhere with you till it gets final release.
 sales@amplework.com
 (+91) 9636-962-228